
The NSER Survey 2025 is the national socioeconomic registration that identifies vulnerable households for social protection programs. This guide explains who should register, what documents and information you need, how survey visits work, how to update or correct your record, common problems and practical tips to make sure your household is accurately listed.
What is the NSER Survey and why it matters
The NSER (National Socioeconomic Registry) is a government survey that creates a nationwide database of household socioeconomic profiles. It collects essential information about family composition, income sources, housing conditions and assets. That database serves as the official reference for targeting social assistance programs, emergency payments, and poverty-alleviation initiatives—so being correctly registered can determine whether a household receives cash aid or other benefits.
Who runs the NSER Survey & its link to assistance programs
The survey is implemented through the official registration system and local field teams. Registration data is used by social protection programs to identify eligible beneficiaries for cash transfers, emergency payments, subsidized services and other support. Accurate registration ensures fair access to help when programs open new enrollment rounds or emergency distributions are announced.
Who should register — eligible households & priority groups
Every household that believes it might qualify for social protection should register. Priority groups often include:
- Households with no steady income or extremely low income
- Female-headed households and widows
- Households with elderly members and people with disabilities
- Families that are displaced, homeless or have recently lost income
- Families with many dependents and no working adult
Register even if you are unsure—being in the database allows you to be considered for future assistance.
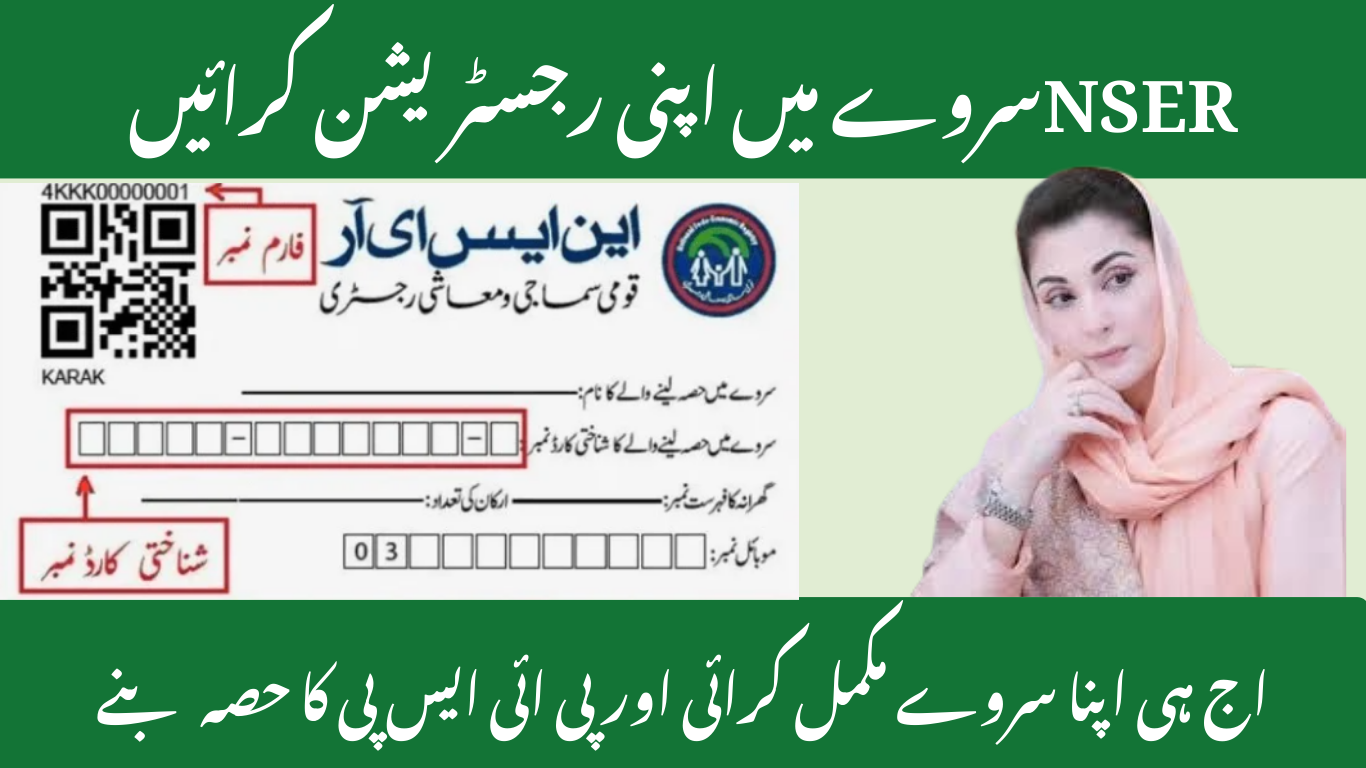
Required information & documents for registration (prepare these first)
Before the surveyor arrives or you visit a registration point, gather:
- National identity card (CNIC) of the head of household and all adult members.
- Birth certificates or B-Forms for children.
- A clear household roster with full names and relationship to the head.
- Proof of current address (utility bill, rent receipt, or local authority letter).
- Any proof of disability, pension, or other special status (medical certificate, disability card).
- Bank account details or mobile wallet number if listed for future transfers.
File and format tips: keep scanned copies or clear photos saved on your phone (JPEG or PDF). If you will be photographed or asked to show originals, keep them together in a safe folder.
Step-by-step registration process (door-to-door & registration centers)
There are two common registration channels:
Door-to-door visit
- A verified surveyor visits your home with an ID badge—verify identity before answering.
- The surveyor asks household details and records names, CNICs, income sources, assets, housing type, and utility access.
- The surveyor may take a photo of the household head and the home, and request signatures or thumbprints.
- After entry, you will be given a reference or tracking number—note this for follow up.
Registration center or portal
- Visit the registration center or the official portal during announced hours.
- Provide CNIC and household details and upload required documents.
- Receive a registration receipt or reference number.
- Await verification visit or status update via SMS.
Field-by-field tips: spell names exactly as on CNICs, provide accurate income ranges (do not understate income thinking it helps), and list all household members.
Household verification — what surveyors check (sample questions)
Verification teams confirm the data collected. Typical checks include:
- Do you and your family live here permanently?
- How many adults and children live in the house?
- What are the main sources of income (daily wage, remittances, salaried work)?
- What type of housing do you live in (owned, rented, temporary shelter)?
- Do you or any family member have a disability or chronic illness?
- Do you receive any other government support or pensions?
Being honest and having documents ready speeds up verification and improves the accuracy of your record.
How to correct or update your NSER record
Mistakes happen. If a detail is wrong—name spelling, missing family member, change of address—take these steps:
- Use the reference number provided at registration to request a correction via the official helpline or portal.
- Visit the local registration office with original documents and explain the correction. Bring supporting evidence (updated CNIC, utility bill, birth certificate).
- Request a re-verification visit if the record was rejected or marked incomplete.
- Keep all tickets/receipts of requests, and follow up regularly until the change is reflected.
Common updates include adding newborns, removing deceased members, and correcting income or address changes.
Common problems & troubleshooting (and fast remedies)
No SMS after registration — check portal with your CNIC; sometimes SMS delivery is delayed.
Surveyor identity concerns — always ask to see ID and registration slip. Do not share bank details or passwords.
Biometric or verification failure — request manual verification and keep the token number for tracking.
Rejected record — ask for a clear rejection reason and provide missing documents immediately.
Duplicate or multiple entries — request consolidation by providing proof of household composition.
If local staff are unhelpful, escalate via the official helpline and keep records of all communication.
How NSER affects payments & program eligibility
Being in NSER does not automatically mean you will receive all benefits; it makes your household visible for selection. Programs use NSER data plus additional criteria to shortlist beneficiaries. Update your record before any announced selection rounds to maximize chances of inclusion.
Privacy, data use & security — what happens to your information
Your registration data is stored in a secure database and shared with authorized social protection programs for beneficiary selection and program delivery. Personal data should not be publicly exposed. Ask surveyors or registration staff about data protection measures and always refuse unusual requests (bank PINs, passwords). If you suspect misuse, report it immediately.
Tips to pass verification and improve your chances (practical checklist)
- Be at home during the scheduled verification visit.
- Keep CNICs and proof of address handy and organized.
- Prepare a simple household list with relationships and ages.
- If a caregiver or elder has poor fingerprints, request manual verification in advance.
- Politely request a re-check if you feel information was recorded incorrectly.
Frequently Asked Questions
Q: Does NSER registration cost money?
No. Registration is free. Avoid agents who ask for cash to register you.
Q: Can I register if I already receive other support?
Yes—registering keeps your details updated; programs will cross-check current benefits.
Q: How long does verification take?
Verification timelines vary; expect between a few days to several weeks depending on workload and region.
Q: Can someone register on my behalf?
Yes—authorized representatives can register but must present proper ID and documentation.
Q: What if my household moves?
Update your address in the NSER portal or local office as soon as possible.
Call to action & quick checklist
Get ready now: gather CNICs, household list, proof of address, birth documents and any disability certificates. When a surveyor visits, verify their identity, provide accurate information and take note of your reference number. If registering at a center or online, save the confirmation and follow up if you do not receive a status update.
